
4 Easy Machine Embroidery Present Projects & Gift Ideas For The Holidays!
Machine embroidery is a unique craft that allows you to add a personal touch to accessories, home decor, gifts, and other fun items. Whether you’re a seasoned embroiderer or just starting out, there are plenty of easy and enjoyable projects you can dive into. In this article, we’ll explore five easy machine embroidery designs and projects that make perfect gifts and projects for this Holiday season!
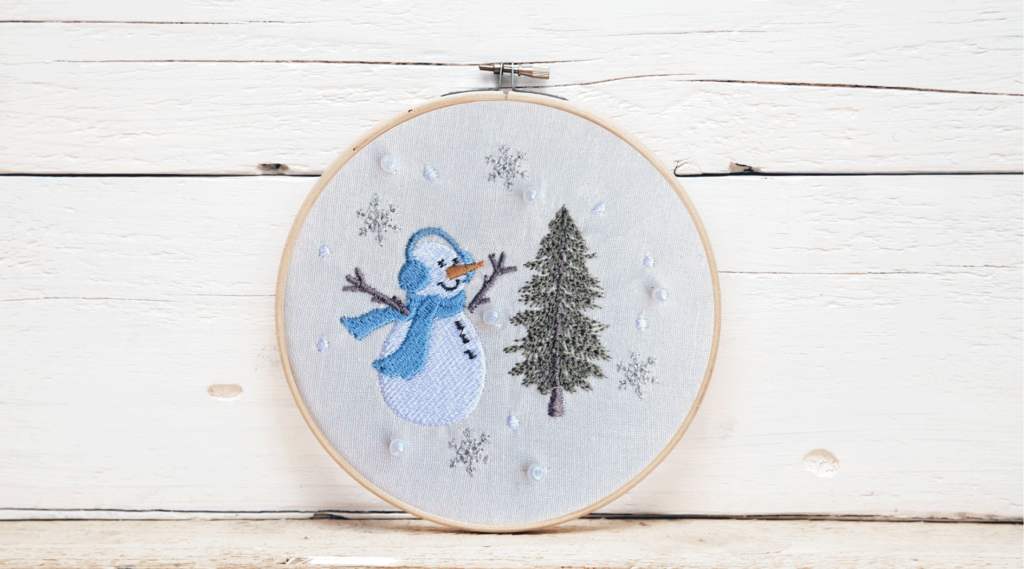
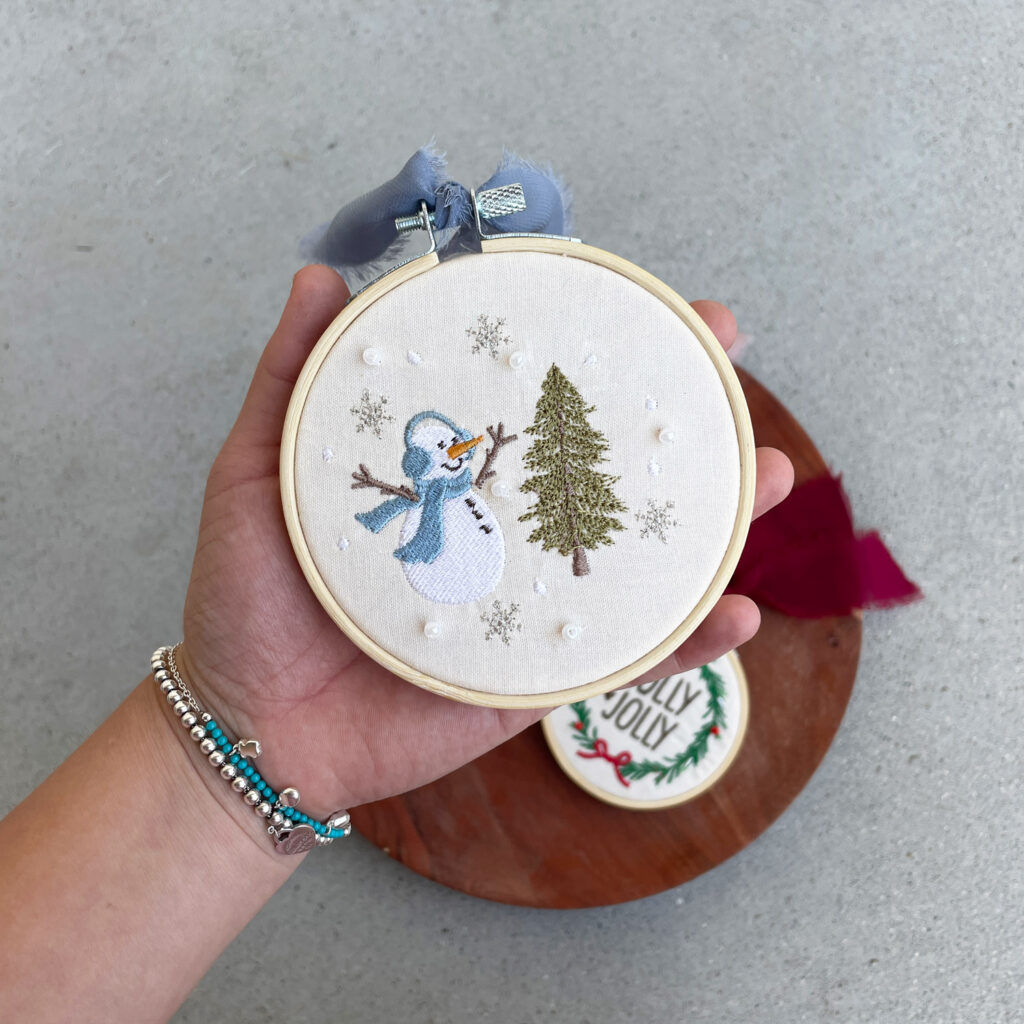
1. Embroidered Holiday Hoop Ornaments
Create Holiday ornaments that add a special touch to your tree or serve as cherished gifts. Embroider names, holiday greetings, or festive designs on blank fabric and hoop it on a wooden hoop to give it that unique “hand-made” style.

Materials Needed:
- 4” wooden hoop
- Cute background fabric for your ornament
- Beads, pom poms, or any fun things you might want to add!
- Embroidery machine, thread and stabilizer
- Embroidery free file from PRO digitizing
Snowman Download
Holly Jolly Wreath Download
Christmas’s Trees Download
Happy Hanukkah Download
Steps:
1) Hoop your fabric securely in the embroidery machine.
2) Load the Holiday design file onto your machine.
3) Select thread colors that match your holiday theme.
4) Begin the embroidery process.
5) Carefully remove the hoop from the machine and trim any excess threads.
6) Hoop your design onto the 4” wooden hoop.
7) Carefully cut any extra fabric around the edges of the wooden hoop and add any final touches such as ribbon or beads!
PRO TIP: Use a variety of designs and colors to create a diverse set of ornaments for your tree.
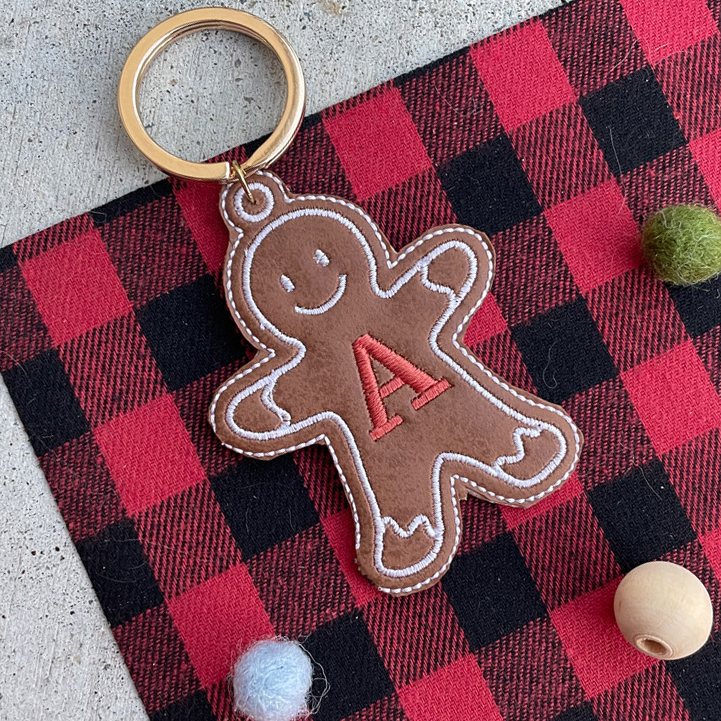
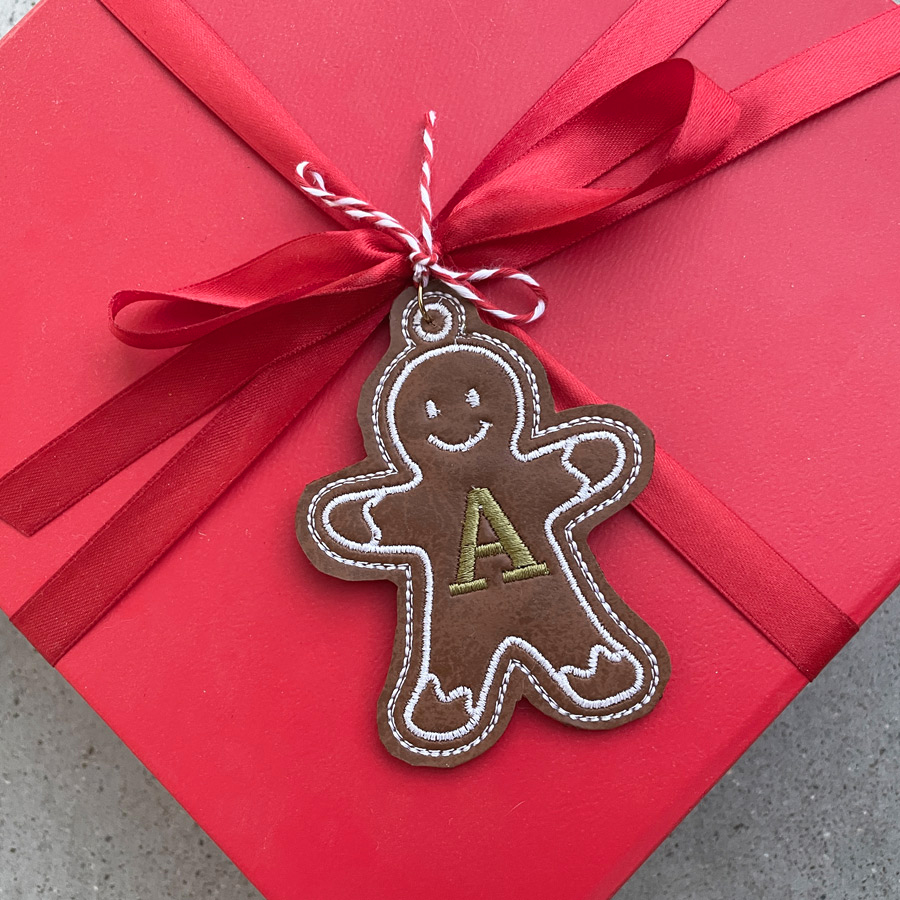
2. Embroidered Keychains & Gift Tags
Keychains are practical gifts that everyone can use. Customize them with embroidered initials or meaningful designs for a personal touch.
Materials Needed:
- Keychains rings and hoops
- Faux leather or felt
- Embroidery machine and thread
- Hole puncher
- Gingerbread Cookie embroidery file
Gingerbread Cookie Tag Download
Steps:
- Load the keychain design file onto your machine.
- Select thread colors that match your theme or recipient’s preferences.
- Initiate the first running stitch to outline the design.
- Carefully cut the piece of the leather you will be using and place it on top of your design.
- Start the second step of the embroidery process, and watch as your design comes to life.
- After you finish the 3rd step, remove your hoop and add a piece of leather to the back of your design. Secure it with tape.
- Allow the final 4th step to proceed, then remove the embroidery hoop and carefully trim around the design’s outline.
- Punch a hole and add your keyring or ribbon!
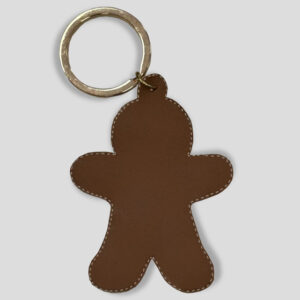
Photo of the back*
Pro Tip: Carefully use a lighter to clean up the edges of the design.
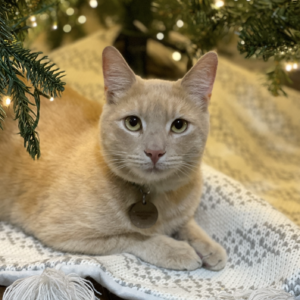
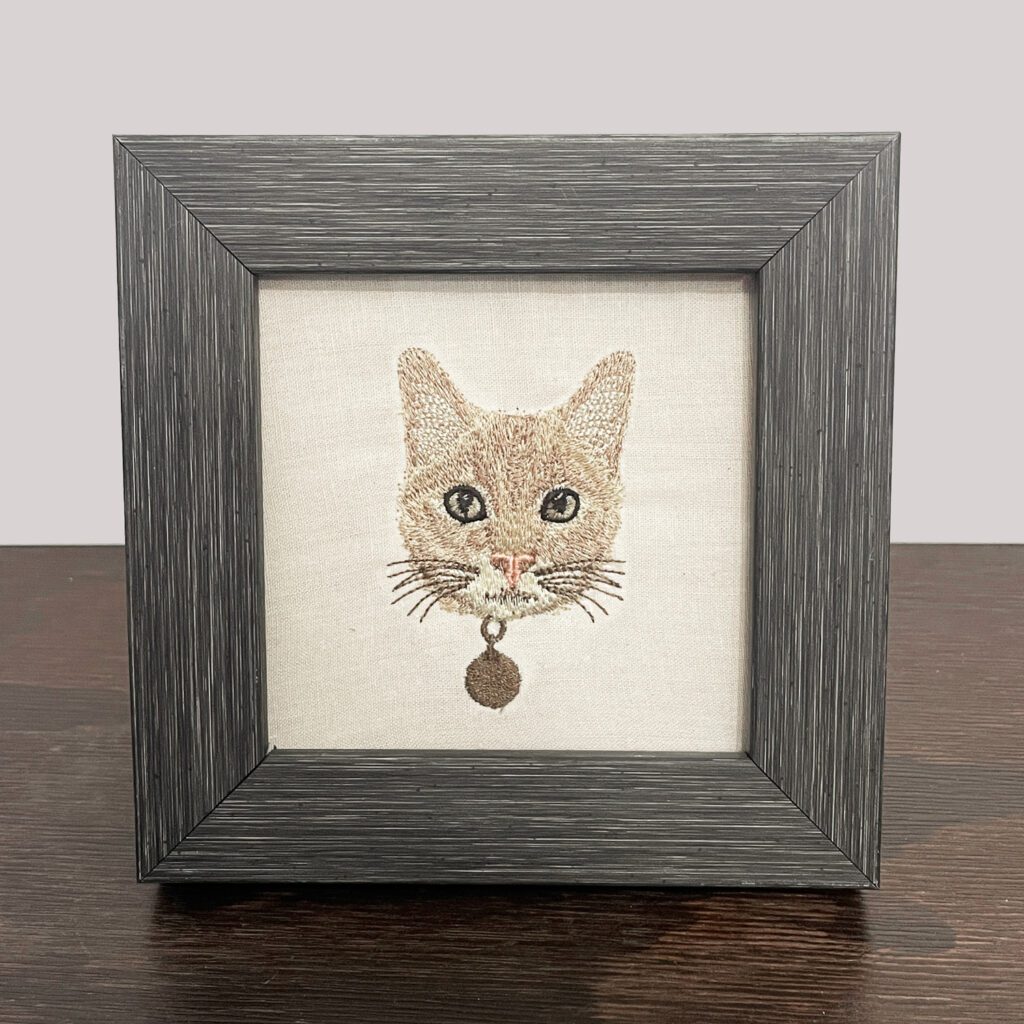
3. Custom Pet Portrait Wall Art
Turn your beloved pet’s photo into a stunning piece of wall art by creating a custom embroidered portrait. This project allows you to capture the essence of your furry friend and proudly display it in your home.
Materials Needed:
- Embroidery machine
- High-quality fabric or canvas
- Frame of your liking
- Pet portrait design file (download here) or place a quote to personalize your own pet!
Steps:
1) Hoop the fabric or canvas securely in the embroidery machine.
2) Load the pet portrait design file, don’t forget to send us a photo of your pet to digitize!
3) Choose thread colors that match your pet’s fur and the background.
4) Start the embroidery process, and watch as your pet’s portrait comes to life.
5) Once the embroidery is complete, carefully remove the fabric or canvas from the machine and trim any loose threads.
6) Frame the embroidered portrait or display it as desired.
Pro Tip: Use a high-quality digitized file from PRO digitizing for the best results in capturing your pet’s likeness.
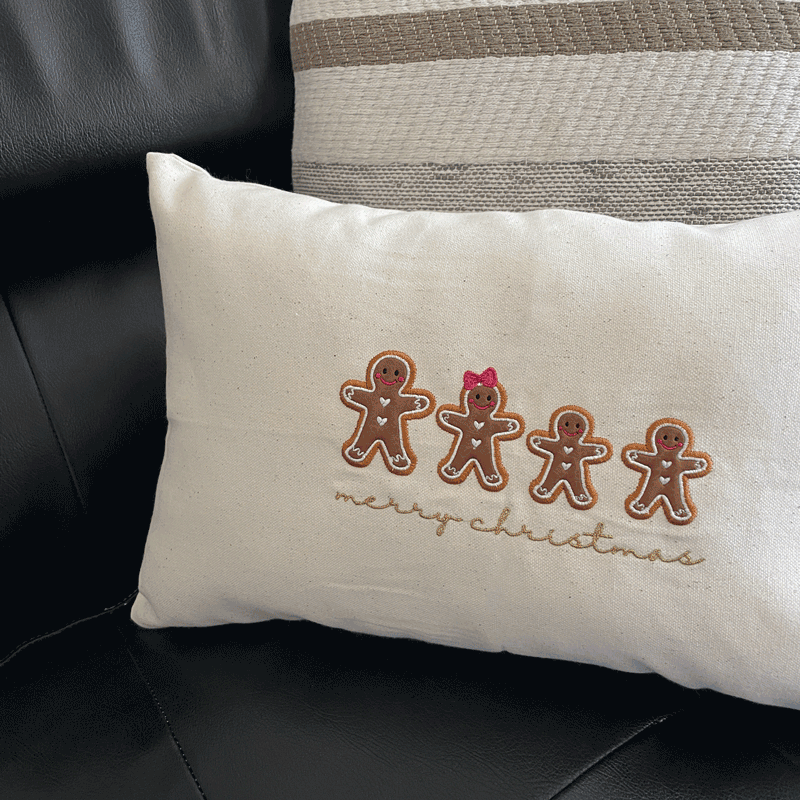
4. Embroidered Pillow Cover
Upgrade your home decor with embroidered pillow covers. These make wonderful housewarming gifts or simply add a touch of style to your own living space. Use fun materials such as leather, fun fabrics, beads, etc.

Materials Needed:
- Plain pillow covers (you can find some at Hobby Lobby or Amazon!)
- Faux leather, fun fabric or felt for the cookies
- Embroidery machine and thread
- Beads or any fun things you might want to add.
- “Gingerbread Cookie” appliqué free file
Gingerbread Cookie Family Download
Steps:
1) Hoop the pillow cover securely in the embroidery machine.
2) Load the pillow cover design file onto your machine.
3) Select thread colors that match your home decor.
4) Initiate the first running stitch to outline the design.
5) Remove your hoop and cut 4 pieces of leather (same size as the cookies). Place the piece of leather on top of each cookie.
6) Put the hoop back on the machine and start the embroidery process.
7) Remove the cover from the machine, and trim any loose threads.
8) Fill your cover with poly-fil stuffing.
Pro Tip: Consider using contrasting thread colors to make the design pop.
Now that you have five easy machine embroidery projects at your fingertips, it’s time to get creative! With the included design files and a little imagination, you can craft personalized gifts that will be cherished for years to come. Happy embroidering!