Embroidery Machine Maintenance Tips: Oiling, Cleaning & More
Embroidery machine maintenance is crucial for ensuring your machine’s longevity and the quality of your projects. In this guide, we’ll explore best practices for keeping your embroidery machine in top shape.
Are you a creative embroiderer? Do you love getting lost in time by creating beautiful, timeless works of art with machine embroidery? If you are, then you know embroidery machines are valuable tools for bringing our creative visions to life. Along with the joys of artistic creation comes the responsibility of machine maintenance. Regular maintenance is essential to keep your machine running smoothly and producing high-quality results. This guide will explore three fundamental practices—oiling, cleaning, and proper handling—crucial for maintaining your embroidery machine and optimizing its longevity.
Oiling Tips:
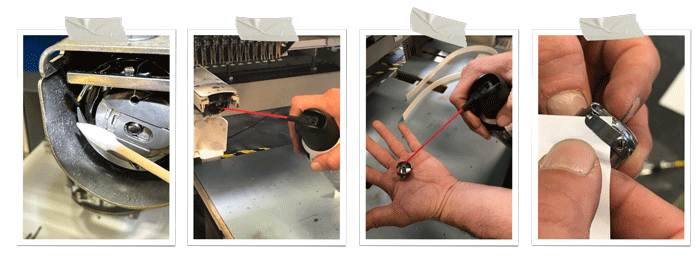
Just like any machine we use in the modern world, regular oiling or greasing of your embroidery machine’s moving parts is vital for several reasons. To begin, it helps reduce friction between components, which minimizes wear and tear and prolongs the machine’s life. Proper lubrication also ensures smoother and more precise stitching by allowing parts to move freely without sticking or jamming. Adequate lubrication helps dissipate heat generated during operation, preventing overheating and potential damage to sensitive components.
For high volume and constant usage, oiling should be completed daily. You can maintain your machine’s performance and reliability over time by adhering to the manufacturer’s recommendations for oiling or greasing intervals and using high-quality lubricants.

Cleaning Tips for Better Embroidery Machine Performance
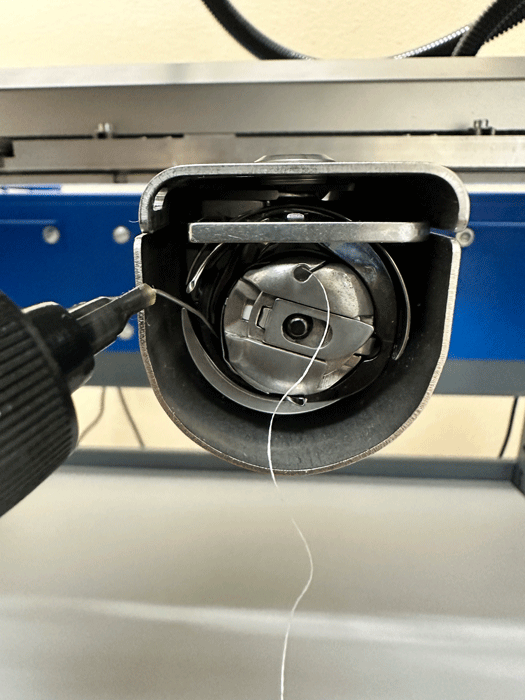
One of the primary actions of good maintenance is keeping your machine clean. Lint and debris can wreak havoc on your embroidery machine’s performance, leading to tension issues and thread breaks. Keeping your machine covered when not being used prevents dust accumulation, ensuring consistent results. Pay special attention to areas such as the thread trail, bobbin case, and trimming area, as these are crucial to the machine’s performance. Lint buildup in these areas can lead to various issues, including tension problems, thread breaks, and machine malfunctions. It’s best to clean the bobbin case before every project for optimal results, as lint accumulates rapidly in this area.
A common oversight in machine care is lint accumulation. Lint accumulation in the thread trail and bobbin area can disrupt the smooth flow of the thread, resulting in irregular stitches and uneven tension. Moreover, excess lint near the trimming area can interfere with the proper functioning of the automatic thread cutter, leading to incomplete trims or thread jams. To help reduce these issues, you can use a Q-tip or brush to clean these areas meticulously for smoother operation and cleaner results.

Daily and Weekly Embroidery Machine Maintenance Tasks
Keeping your machine in peak condition doesn’t require a full overhaul every time you stitch — just a few consistent routines can go a long way. Incorporating daily and weekly embroidery machine maintenance tasks into your workflow helps prevent bigger issues, extends your machine’s lifespan, and ensures every project runs smoothly.
Daily Embroidery Machine Maintenance Tasks
-
Clean the Bobbin Area: Lint builds up fast in the bobbin case and thread path. Use a small brush or compressed air (if approved by your manufacturer) to remove it before each project.
-
Check Needle Condition: Replace dull or damaged needles, especially if you notice thread shredding or skipped stitches.
-
Thread Trail Inspection: Make sure the thread path is clear and properly threaded to avoid tension issues.
-
Surface Wipe Down: Quickly wipe the exterior of your machine to remove any loose threads, dust, or spray adhesive.
Weekly Maintenance Tasks: Deep-Clean & Inspect
-
Oil the Machine (if applicable): Follow your manual’s oiling points and intervals. Machines used frequently should be oiled weekly—or daily in production settings.
-
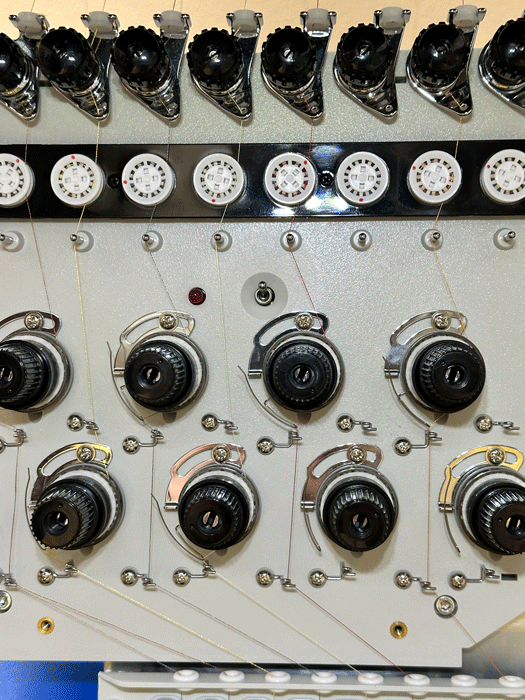
Clean the Tension Disks: Run a thread or soft brush through the tension disks to remove invisible buildup.
-
Inspect Hoop Attachments & Sensor Areas: Look for lint, thread fragments, or wear that may impact function.
-
Backup Design Files & Settings: Save frequently used designs and machine settings externally to avoid loss or corruption.
By staying on top of these embroidery machine maintenance tasks, you prevent problems like thread breaks, needle jams, and inconsistent stitching. It’s a small investment of time for a big return in performance and reliability.

Why Embroidery Machine Maintenance Matters
Your embroidery machine is more than just a tool — it’s a partner in every creative project. Taking the time to oil, clean, and handle it properly ensures not only longer machine life, but also better stitching results, fewer headaches, and more time spent doing what you love. By sticking to a simple maintenance routine, you’ll save money on repairs, prevent interruptions, and enjoy consistent, professional-quality embroidery.
Whether you’re running a business or creating beautiful pieces for fun, a well-maintained machine makes all the difference. Looking to take your projects even further? Pair your top-notch machine care with expert embroidery digitizing services from PRO Digitizing — so your files are just as flawless as your stitching.
Happy sewing — and happy maintaining!

