
Top 5 Embroidery Mistakes and How to Avoid Them
Whether you’re a seasoned embroiderer or just getting started, you’ve probably had that “oh no” moment: thread bunching up, designs misaligned, or stitches just not sitting right. Don’t worry, we’ve all been there. The good news? Most embroidery mishaps are completely preventable.
Below, we break down five of the most common embroidery mistakes, how to troubleshoot them, and how to dodge them like a pro.
Quick Troubleshooting Guide: Symptom vs. Solution
| Symptom | Primary Cause | Immediate Solution |
| Fabric Puckering | Insufficient stabilizer or loose hooping | Use cut-away backing and hoop drum-tight. |
| Frequent Thread Breaks | Dull needle or auto-digitized file | Replace needle (75/11) or check stitch density. |
| Misaligned Outlines | Improper push-and-pull compensation | Use professionally digitized files with proper underlay. |
| Shredded / Frayed Thread | Needle eye too small or improper tension | Switch to a larger needle size or adjust top tension. |
Embroidery Mistake #1: Skipping Stabilizer or Using the Wrong One
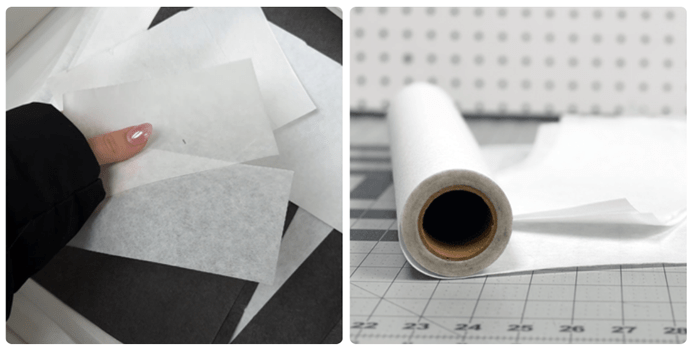
Why It Matters: Stabilizer (backing) provides the structural foundation for your fabric. Without the right support, the rapid punch of the needle will pull the material, leading to severe fabric puckering and ruined alignment (registration errors).
How to Avoid It:
-
Cut-Away Stabilizer: Essential for stretchy, knit, or unstable fabrics (like polo shirts and performance tees).
-
Tear-Away Stabilizer: Best for sturdy, woven materials like denim, canvas, or heavy twill caps.
-
Water-Soluble Topping: Ideal for textured fabrics like towels, fleece, or velvet to keep stitches from sinking into the pile.
Pro Tip: For high-density designs or tricky items, stack two layers of stabilizer or pair a cut-away backing with a water-soluble topping.
Embroidery Mistake #2: Ignoring Needle & Thread Compatibility
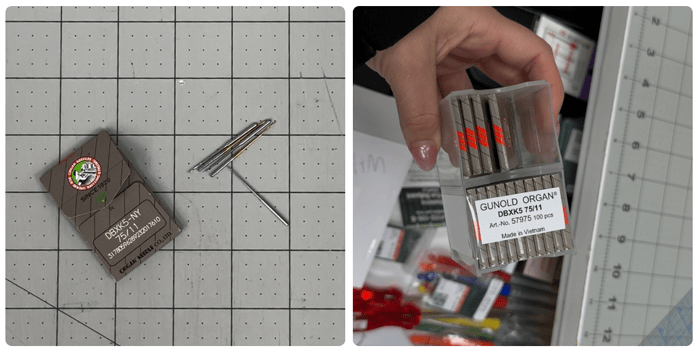
The Mistake: Using the exact same needle size and style for every single job on your machine.
Why It Matters: The wrong needle creates improper hole sizes in the fabric, causing thread shredding, skipped stitches, bird-nesting under the throat plate, or visible holes in the garment.
How to Avoid It:
-
Use Ballpoint Needles for knits and sweaters to push fabric fibers aside instead of cutting them.
-
Use Sharp Needles for crisp execution on woven fabrics, caps, and canvas bags.
-
Use a Larger Eye Needle (e.g., 90/14) when running metallic or heavy specialty threads.
-
Change your needles regularly—ideally after every 8 to 10 hours of active running time.
Pro Tip: Hearing a popping sound or seeing shredded thread near the needle eye? Your needle tip is likely dull or burred—swap it out immediately!
Embroidery Mistake #3: Not Hooping Properly
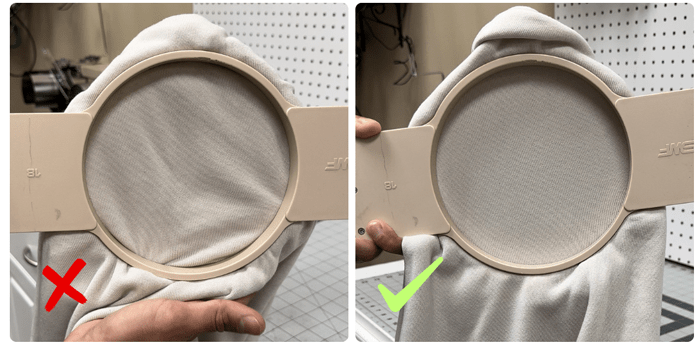
The Mistake: A loose, uneven, or overly stretched hooping job.
Why It Matters: Poor hooping allows the fabric to move independently of the stabilizer during the embroidery run. This distorts geometry, misaligns outlines, and leaves unsightly “hoop burn” rings on delicate fabrics.
How to Avoid It:
-
Follow the “Drum-Tight” Rule: The fabric should feel firm and produce a soft thud when tapped, but it should never be stretched so tightly that the grain or pattern distorts.
-
Always hoop the fabric and stabilizer together unless you are using a specialized sticky or magnetic frame technique.
-
For bulky items or jacket backs, consider using magnetic hoops to prevent heavy creasing and wrist strain.
Embroidery Mistake #4: Starting Without a Test Run
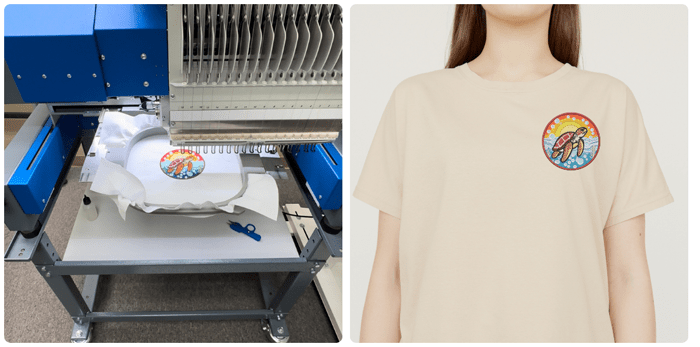
The Mistake: Loading a brand-new file and stitching directly onto a customer’s final garment without testing it first.
Why It Matters: Even professionally digitized files behave differently depending on machine tension, thread type, and fabric stretch. Discovering an issue on a $50 jacket is an expensive way to learn a lesson!
How to Avoid It:
-
Always perform a test run on a scrap piece of the same fabric using the exact same stabilizer and thread combo.
-
Check the back of your test run: you should see roughly 1/3 bobbin thread running down the center of your satin stitches.
-
Keep a bin of fabric scraps from previous jobs strictly reserved for test runs.
Pro Tip: Keep a stash of fabric scraps just for test runs, it’ll save you frustration and fabric.
Embroidery Mistake #5: Relying on Auto-Digitized or Cheap Files

The Mistake: Using free, low-quality, or auto-converted software files that haven’t been manually programmed for thread.
Why It Matters: Auto-digitizing software lacks human intuition. It cannot calculate push-and-pull compensation, underlay density, or proper stitch paths. The result? Excessive thread breaks, needle snaps, bird-nesting, and stiff, bulletproof embroidery patches that ruin garments.
How to Avoid It:
-
Invest in professionally, manually digitized files tailored to your specific garment placement (e.g., left chest vs. cap vs. jacket back).
-
Avoid auto-tracing tools unless you are an experienced digitizer capable of tweaking pathing, density, and entry/exit points.
-
Ensure your files use proper underlay stitches to anchor the fabric before high-density satin or fill stitches run.
Final Thoughts
Embroidery is both an art and a science. When you understand why common mistakes happen—whether it’s improper stabilization, dull needles, or unoptimized files—you can eliminate hours of troubleshooting and protect your profit margins.
At PRO digitizing®, we help apparel decorators, promo distributors, and home embroidery shops avoid these exact headaches. Explore our transparent Flat-Rate Digitizing & Vector Pricing or contact our team today to get your next project running smoothly from the very first stitch!